Wednesday, March 30, 2011

ruffle towels

I bought this shower curtain at Target almost a year ago.  I had tan towels, and they were starting to get mildewy, no matter how much vinegar and baking soda and hot water I washed them with.  Target sales some cute ruffle towels, but they are too expensive for me.  I headed to Ross and found these great plain white bath sheets (yes, they are bath sheet size, and they are quite thick too) for a mere $7 each.  So I bought 4 and a hand towel and a rag.  I spent the same money on all of it, as one set costs at target.  I decided to add my own ruffles, to match my shower curtain.  I forgot to take pictures (I forget to do that a lot), but it is easy to explain
you could use a sheet, or muslin.  I cut 2" strips, 2x as wide as my towels.  I used my rolled hem foot to finish the edges (the one on my new sewing machine works amazingly well, it was a piece of cake).  You could also use a serger for the edges, or hem them the old fashioned way (I am just too lazy for that).  I did about 6 strips of ruffles on each towel.  to ruffle the strips, I just set my tension to the highest and my stitch length to the longest (this never worked on my previous cheap machine, but it worked like a charm on these).  Then I just sewed them on, kind of close together, so when they get washed and crinkle up, there wont be too much space between ruffles.  


Posted by Picasa

it took me about 2 hours to do one hand towel two rags, and two bath sheets (I still have two towels left to do).  It is the first time I have done an entire two hours of sewing without one single frustration.  I couldn't believe it, everything went as planned, no unpicking seams, or re-cutting fabric.  The machine hemmed perfectly, and ruffled perfectly.  That never happens.  When I add the ruffles to the other two, I am going to add hoods, for my two little girls.  I will do a tutorial on hooded towels then.

I love that they are white, because I just use bleach everytime I wash them and I know they wont get mildewy like the others.

knit toddler dress

I saw this  tutorial yesterday and I had to make one right away.  I could not get over how cute that dress is.  So, I started last night, and I finished during nap time today.  I made mine more of a jumper style, because I am too lazy to do Sleeve's.  I used left over knit from other daughter's room.  I got the knit at Hobby Lobby.  I only bought 1 yard and there was just enough left over from my daughter's room to make this dress.  I used an old t-shirt of mine for the pink jersey knit.  I am very happy with how it turned out (good thing no one can see the inside, it is sloppy).  It is the first dress I have made though, so I am pleased.


Posted by Picasa

Friday, March 25, 2011

how to hem jeans

The first thing I did with my new machine is hem my jeans.  I have never done this before.  I have never needed to.  I like my jeans to have a 36" inseam, and frankly, can never find any long enough to wear, let alone, long enough to hem.  I actually know now that I can find dozens of options at The Buckle, if any of you long-leg people are still looking.  I found these BKE' s(at quite an affordable price I might add) and loved them.  They come as long as 37 1/2" in seam.  I was so excited to get a pair of jeans that I don't have to worry about shrinking in the dryer.  I took these babies home and washed them in really hot water and put them in a really hot dryer to shrink them before I hem them.  and I have been wearing them rolled up for a month, waiting for a new machine to hem them with.  I used this tutorial, it was a piece of cake (took about 15 minutes) and I love that I can put them in dryer and know they will come out long enough to wear again

I have been sewing all week, loving my new machine, more posts to come

New (old) sewing machine!

I finally got a new sewing machine! I am so excited!  I have been missing having a functional and reliable seswing machine around.  I had no idea how much I loved sewing to boost my mood, until I did not have one. I really had no idea how much it could boost my mood having one that works so well.  The old cheap plastic singer from Target was great to start with, fun to play with, and great to learn on.  However, it started to skip stitches, after only a few years, and it constantly gave me other hassels.

I have been wanting a solid metal, well-built machine for a long time.  Everyone swears by old Bernina's.  They get rave reviews by veteran sewers, sewing machine repair guys, and everyone who has ever sewed on one.  They are hard to come by though, since they are not made like this anymore (solid metal, and made in Switzerland), and people have realized their value.  Lucky for me, I know a guy!  Well, I met a guy, he only lives a few miles away and used to be a sewing machine engineer for Bernina.  I met him because I called him to look at my old machine when it broke.  He knows his stuff, and is wonderful to work with.  He has a shop in his garage, and even has designed, pattented, and built his own quilting machine's.  He found me this Bernina 801 sport, and went through the whole machine checking every single part, and replacing any that were worn.  Then he called me to his house and spent two hours showing my how to use it, all of its capabilities, and answering questions.  He sent me away with this machine (which is in mint condition), a manual, a cover, needles, oil (and how and when to oil it), bobbins,  multiple feet for the machine, and a warranty.  I could not be happier.  I have been sewing on it all week and it is a dream! It is so quiet, and so smooth.  The best part? I have not had a single problem or frustration all week!  I have never sewn a project without having some sort of set back before this week.  I am in love with this Bernina. We are going to be friends for a long time.  I have decided a machine with reliable basics is worth way more than a machine with unreliable, cheaply built fancy stuff (and I can't afford a machine that is both reliable and fancy).

This machine was $425 (it is a smaller model, a sport), and I do not have an ounce of buyer's remorse.
if you are in Utah and you want one too (or if you want your machine fixed or maintained) I definitely would recommend Neal Iund to anyone and everyone
Neal Iund
Centerville, UT
8012929726
naiund1@gmail.com


Posted by Picasa

little girl's room

As long as my sewing machine is not working, I figured I might as well spruce up my little girls' room.  The walls have been pretty bare in there. 

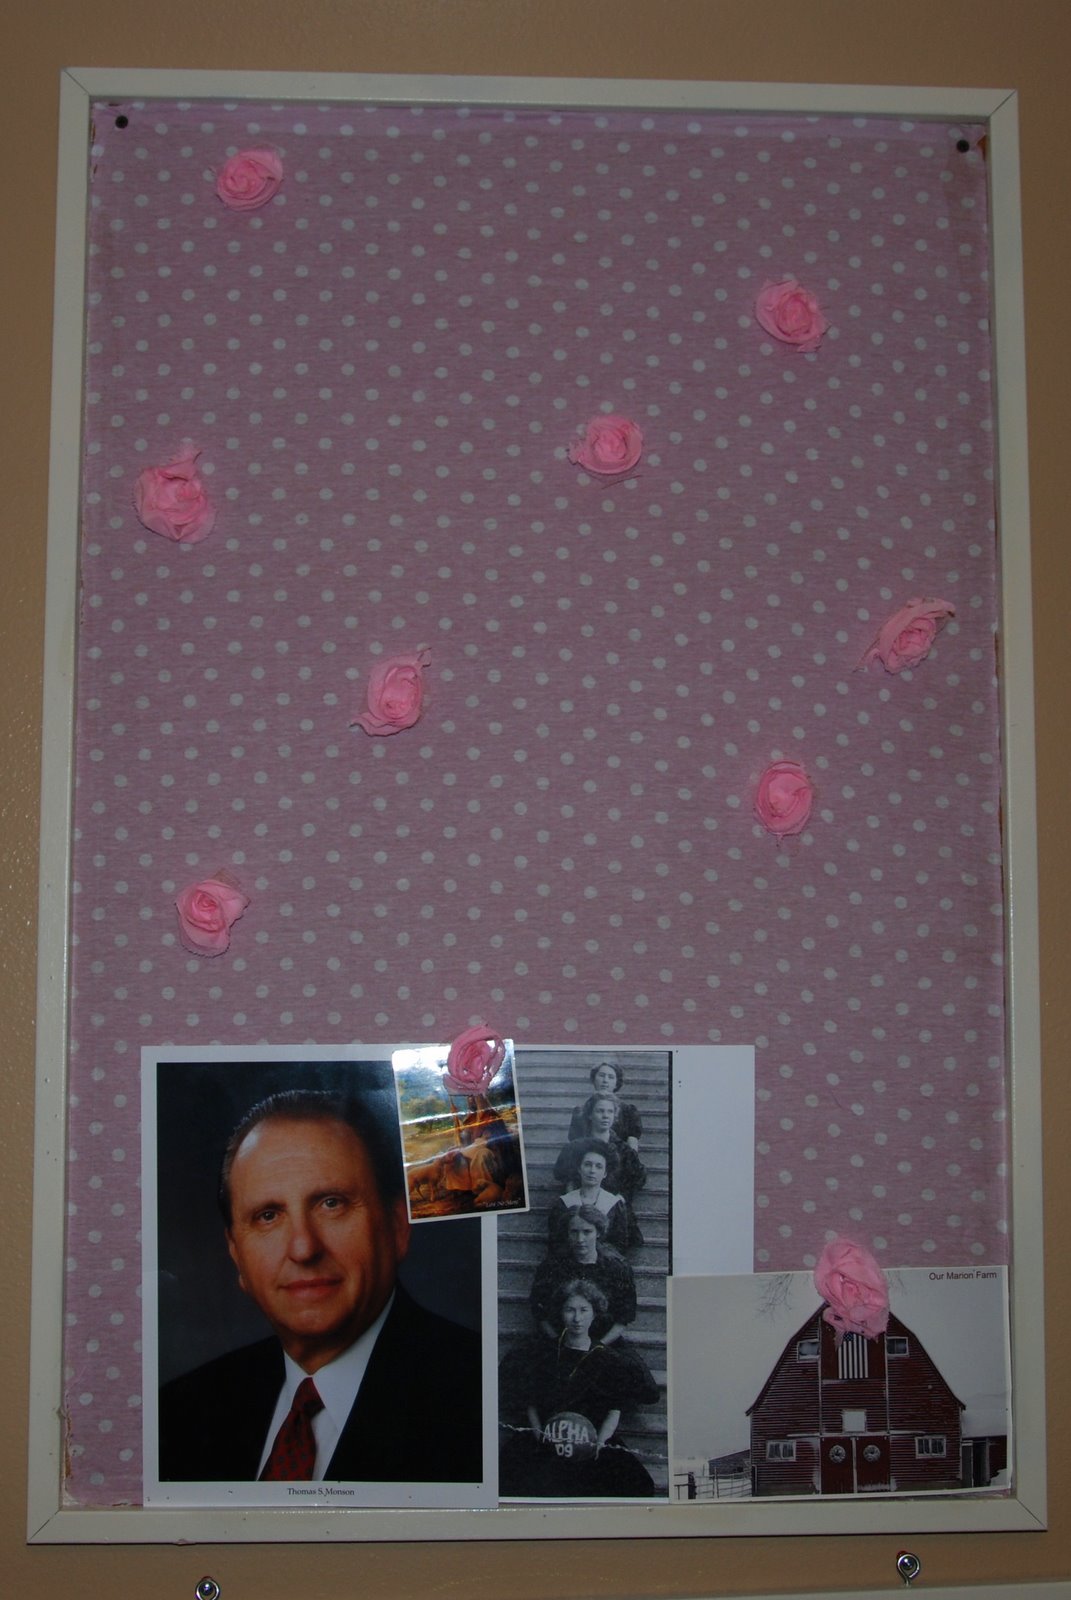
I spray painted this magnet board and used spray adhesive to stick some fabric to it.  I think I need to re-do the spray paint job though, the top is bugging me.  I made some pink rose magnets with some flower trim I bought.  I just cut out a single rose off the trim and hot-glued a magnet to the back.  


I also spruced up her bulletin board.  I spray painted it, and used spray adhesive again to stick some fabric over it.  I used the same flower trim to cut off roses and hot glue them to push pins.  Now I have somewhere to hang all her pre-school art work.  For now it just has the prophet, Christ, My great-grandmother's bball team (the first University of Utah Women's bball team, my great-grandma is second from the bottom), and a picture of my parents' farm


I also made a bow holder, we were losing bows all over the house before this.  I just bought a picture frame at Hobby Lobby for 50% off, removed the glass, stapled fabric around the cardboard


and used a staple gun to attach chicken wire to the back side of the board, so I would have something to clip the boards on to (I just had chicken wire in the garage from another project, but I got it at Home Depot)
Posted by Picasa

fabric flowers

I know my blog has been ignored lately.  In my defense, my sewing machine is not really capable of doing much sewing lately.  I am not big into craft (gasp), but when my sewing machine is out of commission, it does not leave me much choice. So I got out the trusty hot glue gun and some fabric scraps and made me some flowers.  Some have magnets glued on the back, some have a pin, and some have a hair clip, for my little girl's hair


Here is how I made the above flower
For the flower on the left I cut a long strip of fabric, and twisted it and rolled it at the same time, starting on the inside.  I hot glued it onto a round piece of felt as I rolled it.  For the one on the right, I did the same thing, but I braided it and rolled instead of twist and roll


I used this tutorial for this no-sew fabric flower

for this flower I cut a circle out of felt, and rolled lace from the outside in, hot-gluing along the way (the lace was already curved, because it was wrapped around a spool when I bought it).  


here is a tutorial for the felt rose


I used spray adhesive to stick a new ribbon around this lamp, and then I used this tutorial for the flower.  I hot glues a magnet on the back, and put another magnet on the inside of the lamp to keep it on

Thursday, February 10, 2011

laptop sleeve

for Christmas I used this tutorial to make my husband a laptop sleeve.  He thought it was too girly though, so now I claim it as my own.  I guess I lucked out.

Posted by Picasa

camera strap cover and lense cap cover

made my self a camera strap cover and camera lense cover pouch (I am always losing that thing)
I used these two tutorials
strap cover
lense cover case

it was a very quick and easy project.  Now I always know where the lense cap is, and because I used flannel, the strap is extra soft and never irritating on my neck
Posted by Picasa

more self-binding blankets and burps

I made some more baby blankets and burp cloths, for this boy one I used this tutorial

don't panic about the buttons, the ribbon is threaded through them, and then the ribbon is double stitched all the way across, they wont be coming off


for the girl one, I did my usual way, so I could add the ric-rac.  I just placed the ric-rac in place, before I turned the edges under and sewed.  I also sewed the flower on (using the same technique I used here), before I sewed anything together, so the stitching would not be seen on the back of the blanket


I just sewed some scrap fabric on a burp cloth, using some of the left over ric-rac.  I put brown thread in my machine, when I was sewing brown fabric, but I did not want brown seams on the back of the white burp-cloth, so I put white fabric in the bobbin.  This worked great, all brown seams on top, and all white seams on bottom

For the flower, I just grabbed some fake flower petals from my box of petals and used scissors to round the edges.  I just layered them and sewed a little x in the middle to attach them


I pretty much did the burp cloth (pink flower included) the same way here, and the felt flower, the same way. for the blanket I just sewed a piece of cotton to a piece of chenille, right sides together, then turned it and top stitched.

Thursday, February 3, 2011

Hot Pad/ Pot Holders

I made four pot holders/hot pads to enter in Prudent Baby's contest. I would love to win, but I had fun making them none the less, and look forward to having some cute pot holders to use now
 
this one is made from a scrapped 8' table runner, I had to do a french seam down the middle to piece the existing ends together.  Then I scrapped fabric from it to make the Jumbo Rosette


I like this double one, not only because it is so functional, but because it can also be used as a table runner, and would look cute on a table set table, but you can put hot serving dishes on it to protect your table.  I just layered a rectangle of fabric (left over drop cloth), a layer of insulation, a second rectangle of drop cloth, and a square of drop cloth at each end (for the pockets.  For the bows I used muslin squares and sewed them down the edges of the dropcloth/pocket squares, then I tied a strip around the middle for the center, I cut a fat quarter in half (length wise) and sewed it end to end (so it was 2x as long as I needed).  I sewed a basting stitch along the top and along the bottom and then gathered it by pulling one thread thread.  After everything was layered and in place, I just sewed bias tape (I just used leftover drop cloth to make some) around the edges
 
for this one, I bought double fold bias tape to use.  First I sewed on the felt flower using this method.  Then I layered insulation between my two layers for the hot pad. Finally, I sewed the Bias tape on.

Here I just sewed two doilies on a rectangle of fabric.  Then I sewed the insulation to one side.  Next I put wrong sides together and sewed around the hot pad, leaving a space for turning.  I turned it and used Lace Hem Tape for the border. When I sewed the hem tape on It did a topstitch for me, and closed up the opening.  I sewed the top and bottom of the hemtape, making two top stitches

Posted by Picasa