for Christmas I used this tutorial to make my husband a laptop sleeve. He thought it was too girly though, so now I claim it as my own. I guess I lucked out.
Thursday, February 10, 2011
camera strap cover and lense cap cover
made my self a camera strap cover and camera lense cover pouch (I am always losing that thing)
I used these two tutorials
strap cover
lense cover case
it was a very quick and easy project. Now I always know where the lense cap is, and because I used flannel, the strap is extra soft and never irritating on my neck
I used these two tutorials
strap cover
lense cover case
it was a very quick and easy project. Now I always know where the lense cap is, and because I used flannel, the strap is extra soft and never irritating on my neck
more self-binding blankets and burps
don't panic about the buttons, the ribbon is threaded through them, and then the ribbon is double stitched all the way across, they wont be coming off
for the girl one, I did my usual way, so I could add the ric-rac. I just placed the ric-rac in place, before I turned the edges under and sewed. I also sewed the flower on (using the same technique I used here), before I sewed anything together, so the stitching would not be seen on the back of the blanket
I just sewed some scrap fabric on a burp cloth, using some of the left over ric-rac. I put brown thread in my machine, when I was sewing brown fabric, but I did not want brown seams on the back of the white burp-cloth, so I put white fabric in the bobbin. This worked great, all brown seams on top, and all white seams on bottom
For the flower, I just grabbed some fake flower petals from my box of petals and used scissors to round the edges. I just layered them and sewed a little x in the middle to attach them
Labels:
baby,
blanket,
burp-cloth,
embellishments,
flower,
sew tutorial
Thursday, February 3, 2011
Hot Pad/ Pot Holders
I made four pot holders/hot pads to enter in Prudent Baby's contest. I would love to win, but I had fun making them none the less, and look forward to having some cute pot holders to use now
this one is made from a scrapped 8' table runner, I had to do a french seam down the middle to piece the existing ends together. Then I scrapped fabric from it to make the Jumbo Rosette
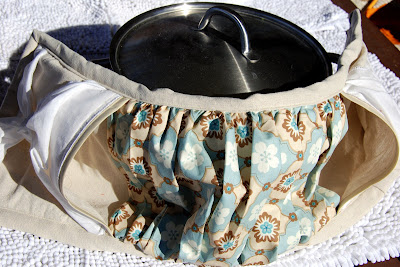
I like this double one, not only because it is so functional, but because it can also be used as a table runner, and would look cute on a table set table, but you can put hot serving dishes on it to protect your table. I just layered a rectangle of fabric (left over drop cloth), a layer of insulation, a second rectangle of drop cloth, and a square of drop cloth at each end (for the pockets. For the bows I used muslin squares and sewed them down the edges of the dropcloth/pocket squares, then I tied a strip around the middle for the center, I cut a fat quarter in half (length wise) and sewed it end to end (so it was 2x as long as I needed). I sewed a basting stitch along the top and along the bottom and then gathered it by pulling one thread thread. After everything was layered and in place, I just sewed bias tape (I just used leftover drop cloth to make some) around the edges
for this one, I bought double fold bias tape to use. First I sewed on the felt flower using this method. Then I layered insulation between my two layers for the hot pad. Finally, I sewed the Bias tape on.
Here I just sewed two doilies on a rectangle of fabric. Then I sewed the insulation to one side. Next I put wrong sides together and sewed around the hot pad, leaving a space for turning. I turned it and used Lace Hem Tape for the border. When I sewed the hem tape on It did a topstitch for me, and closed up the opening. I sewed the top and bottom of the hemtape, making two top stitches
Subscribe to:
Posts (Atom)