Showing posts with label baby. Show all posts

Thursday, February 10, 2011

more self-binding blankets and burps

I made some more baby blankets and burp cloths, for this boy one I used this tutorial

don't panic about the buttons, the ribbon is threaded through them, and then the ribbon is double stitched all the way across, they wont be coming off


for the girl one, I did my usual way, so I could add the ric-rac.  I just placed the ric-rac in place, before I turned the edges under and sewed.  I also sewed the flower on (using the same technique I used here), before I sewed anything together, so the stitching would not be seen on the back of the blanket


I just sewed some scrap fabric on a burp cloth, using some of the left over ric-rac.  I put brown thread in my machine, when I was sewing brown fabric, but I did not want brown seams on the back of the white burp-cloth, so I put white fabric in the bobbin.  This worked great, all brown seams on top, and all white seams on bottom

For the flower, I just grabbed some fake flower petals from my box of petals and used scissors to round the edges.  I just layered them and sewed a little x in the middle to attach them


I pretty much did the burp cloth (pink flower included) the same way here, and the felt flower, the same way. for the blanket I just sewed a piece of cotton to a piece of chenille, right sides together, then turned it and top stitched.

Thursday, January 13, 2011

another crochet hat

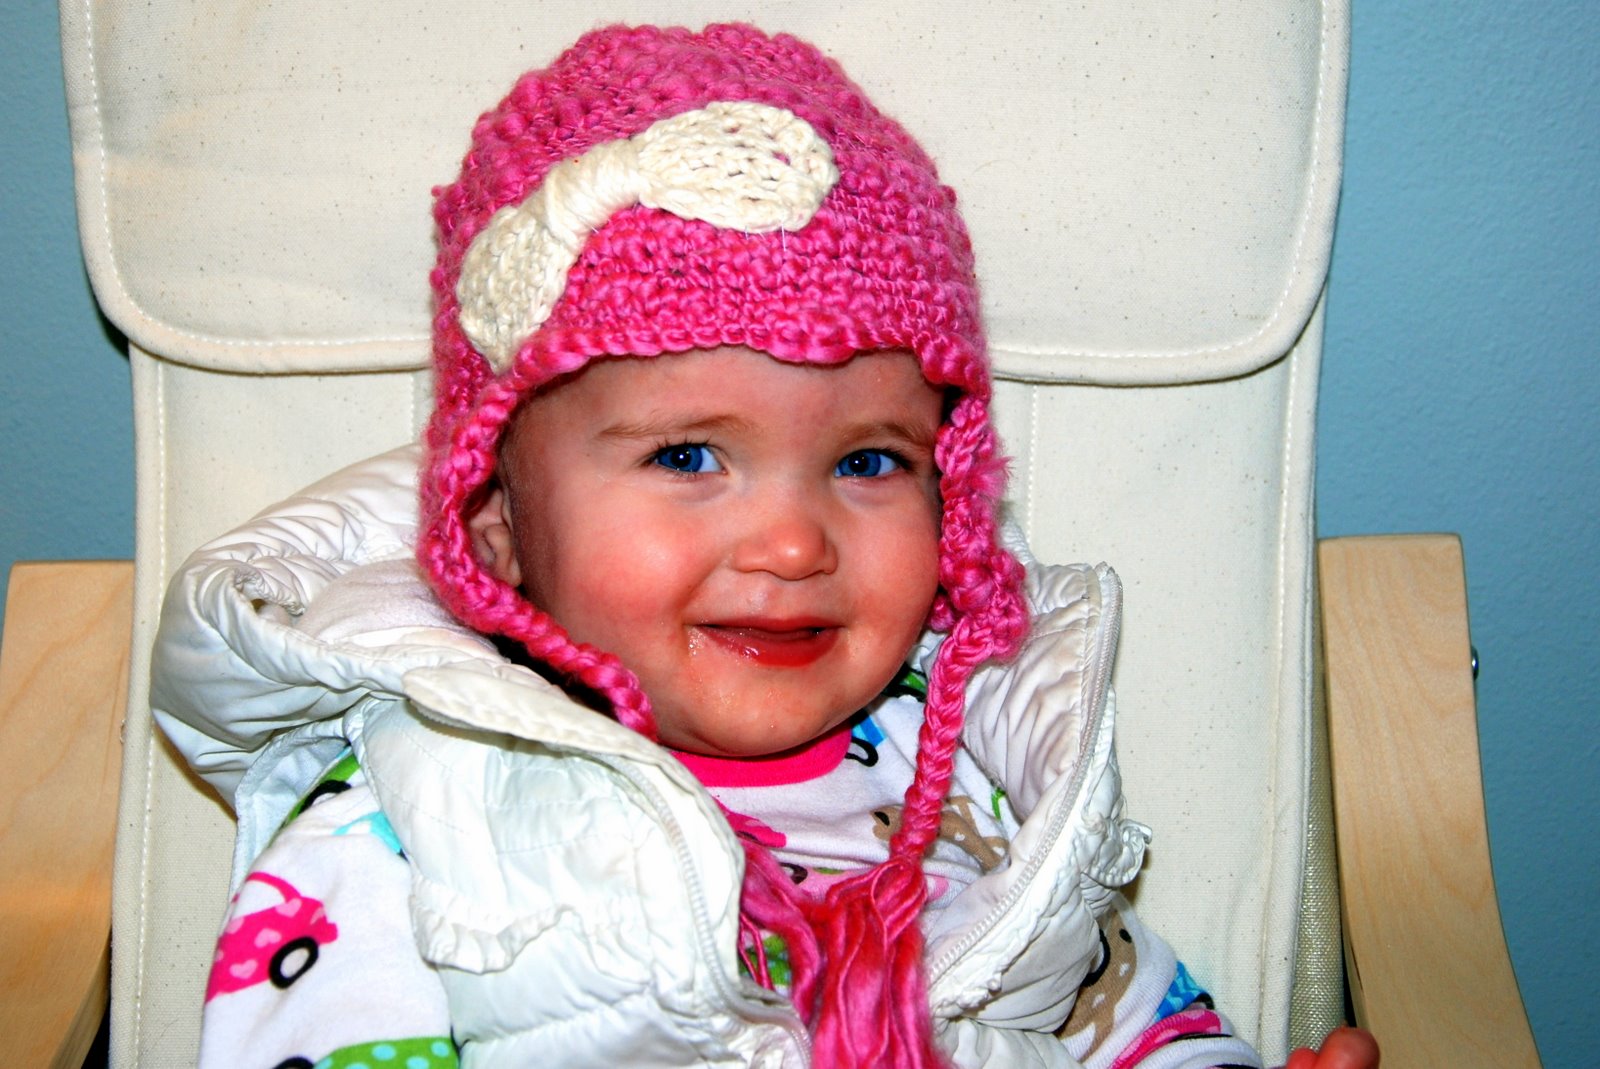
My girl LOVES hats.  The first thing she does when she wakes up, is finds a hat to wear.  Then she will giggle and laugh when she puts it on, and say "hat" while patting her head, over and over again.  So I could not resist making her one, and you know what? She has not taken it off since I gave it to her three hours ago.


I basically followed the hat pattern here, minus the ears and face.  I used a size k hook, instead of a J, and I followed her instructions for a bigger hat.  then I used instructions from this hat to do the flaps and the tie's
finally, I followed instructions here for the bow, and sewed it to the hat.  You could also do a flower, or a ribbon.

I only had one problem.  I really like textured yarn lately, so I used this yarn that I got for only $1 in the clearance bin (that is right, this hat cost me $1 and about and hour and a half of my time, while I watched a movie).  Since this yarn is thick in some places and thin in others (not the recommended worsted weight, for the pattern) I had to make adjustments for the size.  In fact, the directions I just gave you ended up making a small hat, too small for my 18 month old.  But it fit my 9 month old niece great.  So I made a second one for my 18 month old, making it bigger this time.


I know the texture may look sloppy, but I like how it turned out.
Posted by Picasa

Monday, November 1, 2010

more baby blankets and accessories

I know I have already explained how to do the receiving blankets, but I thought I would show the ones I made today.  
This one is for a friend, whose sweet new baby had to endure the NICU (having experienced it, something I would not wish on my worst enemy).  and a couple eye surgeries as well

This set is for a good friend who just had twin girls.  Don't you LOVE Amy  Butler fabric? I sure do!  Her little girls also had to be in the dreaded NICU, but are home now

This set is for a baby shower tomorrow, but I don't think she reads this blog, so I feel safe posting it.
I followed this tutorial for the baby legs, but I found this one later, that I want to try next.

I have posted about the crochet baby hats before but this time I found a free tutorial (plus she has other great tutorials), I thought you might want a link to a free one, and it literally took me exactly 61 minutes to make, not bad huh?

For the Onesie, I just used some of my ruffle fabric.  I cut it how long I wanted, measured it 2x as wide as the onesie, and put it right sides together, sewing one quarter inch seam (making sure all ruffles were hanging down), making a tube.  Then I just folded the top over and sewed it on the onesie (I did not need to hem, because it is knit and does not fray).  I lined the one seam up with the side seam on the onesie.  sorry if this is confusing, I did not take pictures, but it was so easy.

For the burp clothes, I just sew on random fabrics, ribbons and embelishments, there is really no rhyme or reason to it, I usually don't even have a plan when I start.  I just want to say that I only like the tri-fold birds-eye ones.  I got the wrong kind once, and hated them.  I get mine at Target, and they are Gerber brand, they come like 12  in a pack I think.  Also, MAKE SURE TO PRE SHRINK THE DIAPERS! Wash them in really hot water and dry them in a really hot dryer.  It is the pits to make an adorable burp cloth, only to wash it and have it way smaller than the fabric you sewed on.
Posted by Picasa

Monday, August 23, 2010

make your own chenille baby quilt

first off, I apologize for the bad pictures, I did not realize the camera was in the wrong mode, until I was done with the project

Here is a baby blanket/quilt I made for a friend, I just found a cute piece of fabric and layered it on top of four layers of muslin (five layers, one yard each) to make my own chenille.  The process of making my own chenille happens to quilt the top.  This is not too hard, but it takes a long time (4-6 hours) and a lot of thread
here are my five layers lined up on top of each other

then you sew diagonal lines down the back.  I just use your presser foot as a guideline, and do them 1/4" apart.  I did mine a little bit wider, because I wanted my quilted lines to follow the diagonal lines on the argyle print, so I just quilted on front, using the argyle for my guideline.  This made the chenille a little wider than I normally prefer, but I still like the look. 
next you get one of these nifty chenille cutters (scissors will work, but make it more difficult)
I got mine at Michael's, I don't remember how much, but I had a 40% off coupon.  You can always find a good coupon to Jo-Ann's and get one there too


.
you cut the bottom three layers (make sure not to cut the top layer, or the top layer of muslin)

next bind your quilt, there are some good tutorials out there, here is one I like 

Posted by Picasa

then you wash it a couple times, and it looks like chenille


after I made this quilt, I found another great tutorial for a similar blanket, with a twist. I think I will try it her way next time
Posted by Picasa

Monday, April 5, 2010

crocheted booties

I bought the patterns for these booties on Etsy, and I really liked how they turned out. I made some for my expecting sisters, and am half way through making some bigger ones for my baby. Sorry I cannot give you the patterns, but you can search Etsy.com in the baby crochet patterns to find these, and many other cute patterns.


Posted by Picasa

diaper bags

I found a free tutorial to a diaper bag I love! I am so glad someone was nice enough to post it. I made three in two days (which I would not recommend, I totally ignored my family). I made the black one for me, and the other two for my expecting sisters. I love how they turned out! They are so cute, but also so functional. There are five pockets on the outside and five inside.
I used home decor fabric, I found the pink ones back in November for like 60% off at Jo-Anne's and I found the babric for my black one at Hobby Lobby for about $8 a yard. I used really heavy weight interfacing, because I love the look of a bag that stands up on its own.


I added this little strap with a hook, to hook on keys or a binky or something. I also made the strap on mine extra long, so I can sling it around my neck and arm, not just my arm, then I have more mobility with my arms. I also added metallic snaps to the outside pockets on mine (they are usually kind of expensive, like $4-5$ for one, but I found some on clearance at Jo-Anne's 2 for $2.50) I also added velco to the inside pockets on mine

they have a zippered pocket in the back that I love. It was my first time doing a zipper, but I just followed instructions on my zipper and in my machine manual, and it was quite easy.
Posted by Picasa

car seat blanket tutorial

I have been wanting one of these all winter for my baby, she always kicks her blanket off when I am carrying her around in her car seat. I finally figured out how to make one, but since winter is ending, I decided not to make one for her. I did make two for my expecting sisters though. I hope these steps make sense, let me know if you have questions
I started with two coordinating flannels, one yard of each. I folded each in quarters so I could trace and cut my pattern (make sure you have the folds in the right place)
I do not have a printout of this pattern, but I am hoping you can see the measurements when you click on the picture to enlarge it, and use the measurements to make your own (I just taped pieced of 8.5 by 11" paper together). Make sure your folds are in the right place, and trace the pattern on each piece of flannel


unfold the fabric and mark where the strap holes should be cut (enlarge the two above pictures to see where to measure and cut for the strap holes) mark it on each piece of flannel. Or, if you have a carseat handy, you can put the fabric in your carseat and mark it yourself


cut and press where you will need to sew around the strap holes (do not sew yet!). Pin the fabrics right sides together and sew around the blanket, leaving a gap for turning it right sides out)

pin in place the pressed holes together and sew (if you try to sew them before the previous step, you will not be able to turn the blanket right sides out)

top stitch around the blanket, sewing the gap closed

place blanket in carseat and strap baby in

then swaddle

here is the second one I made


Thank you Heidi for informing me of something I did not know (check comments)

AFTER READING HEIDI'S COMMENT I TRIED TO SEARCH ONLINE FOR VERIFICATION. THIS IS THE BEST THAT I FOUND

it does state that the warranty may be voided (you could call your carseat company)
it also gives guidlines for you to check yourself if your baby is safe in his/her carseat

"Check All Winter Coats for Car Seat Safety
It's easy to check and see whether a baby's winter coat or infant snowsuit is too thick to be safe in a car seat. This test will show you how thick the coat is and how much the coat will compress during a crash.

  1. Take the car seat into the house.
  2. Put the winter coat or snowsuit on the child.
  3. Put the child in the car seat and buckle the harnesses as you normally would before car travel. Adjust the straps to the appropriate fit for your child.
  4. Take the child out of the car seat without loosening the straps at all.
  5. Take the coat off your child.
  6. Put the child back in the car seat and buckle the harnesses again, but do not tighten the straps.
  7. If you can fit more than two fingers under the harness at the child's shoulder bone, the coat is too thick and is not safe for use with the car seat."
it also says, near the bottom, "

However, there are no federal guidelines governing after-market car seat accessories. These extra car seat covers and buntings could interfere with the function of the car seat harness, and many car seat manufacturers will void your car seat warranty if after-market accessories are used. "


It could still be useful for a carseat that is strapped into a stroller, rather than a car. Or with any five point harness device, such as a stroller itself, or a swing or a bouncer

minky blanket tutorial

I made a couple minky blankets over the weekend. I bought the fabric months ago on clearance, and I have been wanting to use it, but scared it would be hard to sew with. and when I attemped to about six moths ago, it was. Then I was told to use a walking foot, and it was a breeze.
I found this silky ruffle blanket binding at walmart
after cutting th minky to my desired size I `pinned the ruffles face down to the right side of the fabric
then I pinned the back piece of fabric , right side down, on top of that. I stitched all the way around, leaving an opening to turn, turned it right side out, and sewed the opening closed. I did use my walking foot, and I did not top stitch, I was afraid it would bunch, and I like how it looked without the topstitch. It took me about half an hour to make one


here is the second one I made


I made this one for my own babes for Easter, I used the same tutorial as my receiving blanket. This was so easy, I thought it would be hard with minky fabric, but it was so forgiving, the binding fabric is so plush, that you cannot even see the seems.
Posted by Picasa